
Creating a Texture Atlas using Inkscape
Following on from my previous article on Creating Game Graphics in Inkscape, here is a further look at how to integrate your graphics into your game engine.

This time I will be demonstrating a way to combine all of your graphics into a single image file and create an XML file to describe that file in a form that your game engine can understand. This is called a Texture Atlas. Using a texture atlas (sometimes called a Sprite Sheet) allows your game engine to handle your graphics resources in a far more efficient manner than if it had to deal with individual files one by one.
My provided solution will create the files in a format that can be read and understood by the Starling Development Framework, but the method would be easy to adapt to other formats.
I created this guide, having come across several Starling tutorials that seemed to either skip over the process of creating a texture atlas, or else suggest you purchase a tool to do the creation. (Here’s one such “advertorial”, cunningly disguised as an educational video.)
Once again, we’ll be using Inkscape, which due to its friendly XML SVG output format is a great tool to work with. We’ll have to write some code of our own to process the SVG file (don’t worry, I’ve provided everything you need below!) but using Inkscape allows us to leverage the excellent GUI tools it gives us without having to write code to display and manipulate graphics.
Steps
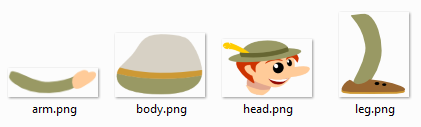
1) Assemble the images you want to add to your atlas into a convenient directory. To demonstrate this I’m starting with these images that I created based on another one of Chris Hildenbrand’s tutorials here.
2) Open up a new inkscape document and do File->Import for each bitmap you want to include in the atlas. Choose the option to Link the bitmap, rather than Embed.
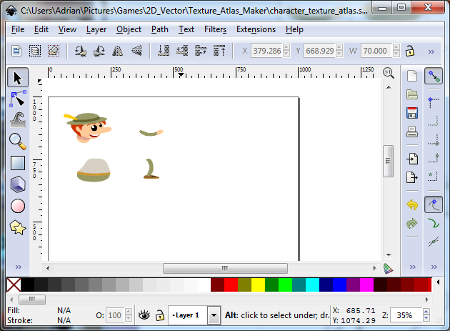
3) Draw a rectangle the desired size and shape of your atlas and fit all of your bitmaps roughly onto it. Use the Page Down key to send the rectangle to the lowest level so that your bitmaps appear on top of it
At this stage you don’t need to be exact as you’ll probably want to jiggle things around in order to get the best fit.
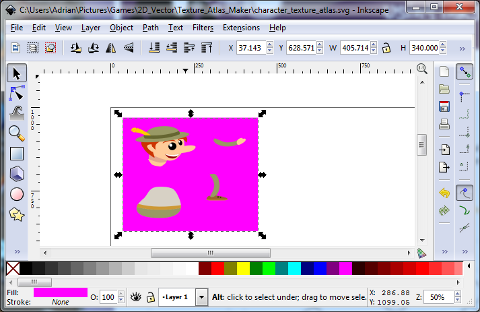
4) Now that you can see how big your atlas is going to need to be, use the H and W boxes to set it to an exact size. Depending on your game engine, you’ll probably want the dimensions to both be powers of two. (256, 512, etc)
In this example, looking at the H and W of the purple rectangle I can see that my texture atlas is going to need to be 512x512 pixels if I want it to be a square.
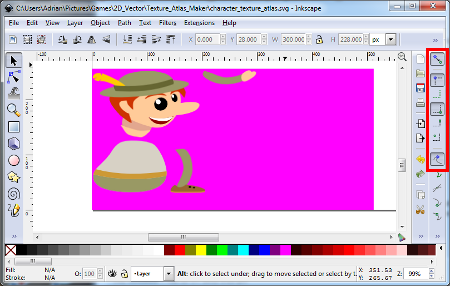
5) Select the atlas rectangle and use “Snap to the page border” to position it in the top left corner of the Inkscape document. I’ve highlighted the icon to do this in the image below.
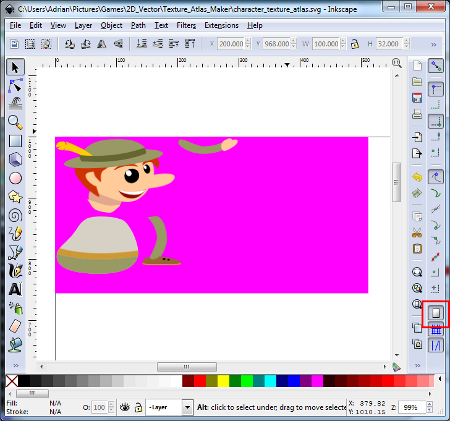
Note that you must do it like this, rather than by typing (0,0) into the rectangle’s X and Y position coordinates. This is because in Inkscape the origin is in the bottom left corner of the document whereas in the SVG output file it is in the top left corner.
6) Use “Snap bounding box corners” and “Snap to bounding box corners” to exactly align your bitmaps with the atlas edges and with each other.
In my example I found that the extra precision gained from using the snap tools allowed me to shrink my texture from 512x512 pixels to 512x256 pixels.
7) Save your file, then use Export to Bitmap as in the previous guide to save a bitmap version of your texture atlas. Remove the fill from the pink rectangle if you don’t want it to appear on your bitmap. Otherwise set it to the colour of your background if you aren’t using transparency in your bitmaps.
Now the great thing about Inkscape’s SVG output format is that it is an XML file that contains all of the information needed to re-create the image. In this case it is all of the sizes and positions of the component images of the texture atlas.
Even better, if you want your texture atlas xml file to be formatted for use with Starling/Sparrow then there is very little you need to change in the svg file to make them compatible.
While you could make these changes in a text editor it’s pretty simple and far more reliable to write a script to automate the process. I did this by creating an XSLT stylesheet that can be applied directly to the SVG file to produce the texture atlas file using MSXSL.EXE.
8 ) Download MSXSL.EXE from here.
9) Download my conversion XSLT stylesheet file here.
10) Run msxsl on your svg file using the command line below:
msxsl input.svg InkscapeToStarling.xslt -o output.xml
Troubleshooting
I found that often Inkscape did not write the coordinates as integers, despite me having typed round numbers into the size and position fields and carefully using the Snap tools to align things. This seems to happen if you have altered the document size. The solution is to create a new layer, cut and paste all of the parts from the layer below into the new layer, then remove the old layer.
As before, here is an example Flash application showing an image made up of the parts from the texture atlas created in this guide:
Texture Atlas Demonstration
Click here to see the texture atlas image. Click here to see the texture atlas XML file.
