DIY Arcade Joystick
I recently received a couple of arcade fighting games in some software bundles I bought from humblebundle.com. Namely, Skullgirls and Street Fighter IV. While they are both playable with a regular XBox controller, they are designed to be played with a proper arcade style joystick. Like this one:
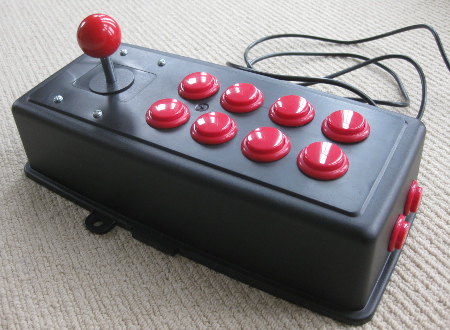
This is my DIY Arcade Joystick made for roughly £20 using only basic tools. Read on for details on how I made it.
It turns out that you can buy all of the parts in a convenient kit from ebay. I bought this one. If that is no longer listed, then type “Arcade Game DIY Parts Kit” to find something similar.
The kit comes all the way from China and contains parts that are copies of Japanese arcade components. They are definitely far worse quality than the real thing, particularly the buttons, but at least this keeps the project costs down. If you wanted you could order official Sanwa buttons and joystick and use those with the USB controller, instead.
I made an initial attempt at fitting all of the components together into an old cardboard box, hoping that it would turn out to be useable and save me from having to do any more work.
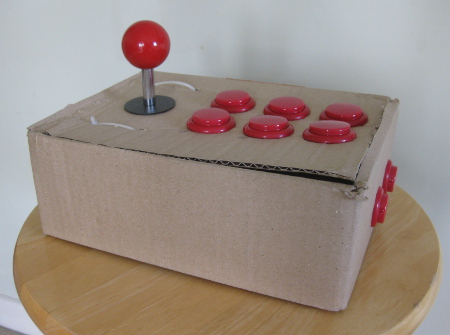
Unfortunately cardboard isn’t really strong enough and the box was starting to give way after just a few rounds of Street Fighter.
However, I recommend this step as it is useful to help you decide how you want to position the buttons. Even if I did still end up getting them too far apart in my final version of the joystick.
The only difficult part of the project is coming up with a proper housing for the buttons. After scouting round a bit I found an old plastic tool box that I wasn’t using and decided to use the lid of the box for my stick’s case. You can buy a similar one from B&Q for £3. While you are in the DIY shop you’ll probably also want to pick up some M3 nuts, bolts and washers to secure the stick to the casing.
After drawing on the case where I wanted the buttons, I used a Dremel tool to (carefully) cut out holes for the buttons and bolt holes for the joystick. The buttons need to fit exactly into the holes, so it is worth cutting accurately. I sanded off rough edges. Since I’d got all my buttons to fit in place nicely I didn’t do anything else to secure them, but I guess if you didn’t think you’d ever want to remove them (say for an upgrade) you could always hot-glue them into place.
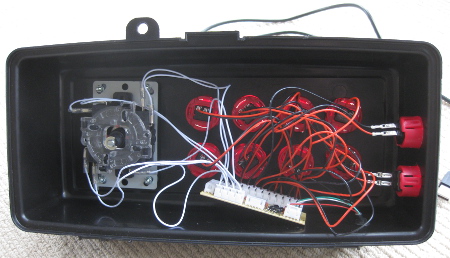
Once everything’s attached it is pretty simple to wire everything together. Doesn’t seem to matter if you get it wrong - you’ll just have buttons that don’t do what you expect - and can change the connections easily.
This is what the inside of my stick looks like. I should secure the board to the case to stop it moving, but didn’t have any bolts small enough to go through the mounting holes on the controller board. I should also add some rubber sleeves to the cables to stop them shorting out against each other.
Although this stick is relatively low quality, versus paying well over a hundred pounds for a proper stick, this has worked out to be a pretty good trade off. I’m still not particularly good at Street Fighter, and still find it tricky to pull off some of the combo moves, but this has taken a lot of the frustration out of playing the game with an XBox 360 controller.