Tesco Chop Box
Following on from last month’s DIY Mixbox project, here is the full size version, The Tesco Chop Box.
The Tesco Chop Box is my budget version of the Hit Box controller. This is another controller designed for playing fighting games such as Street Fighter or Mortal Kombat. Like the Mixbox, it is designed to make it easier for players to make the precise directional and button inputs necessary for accurate fighting gameplay.
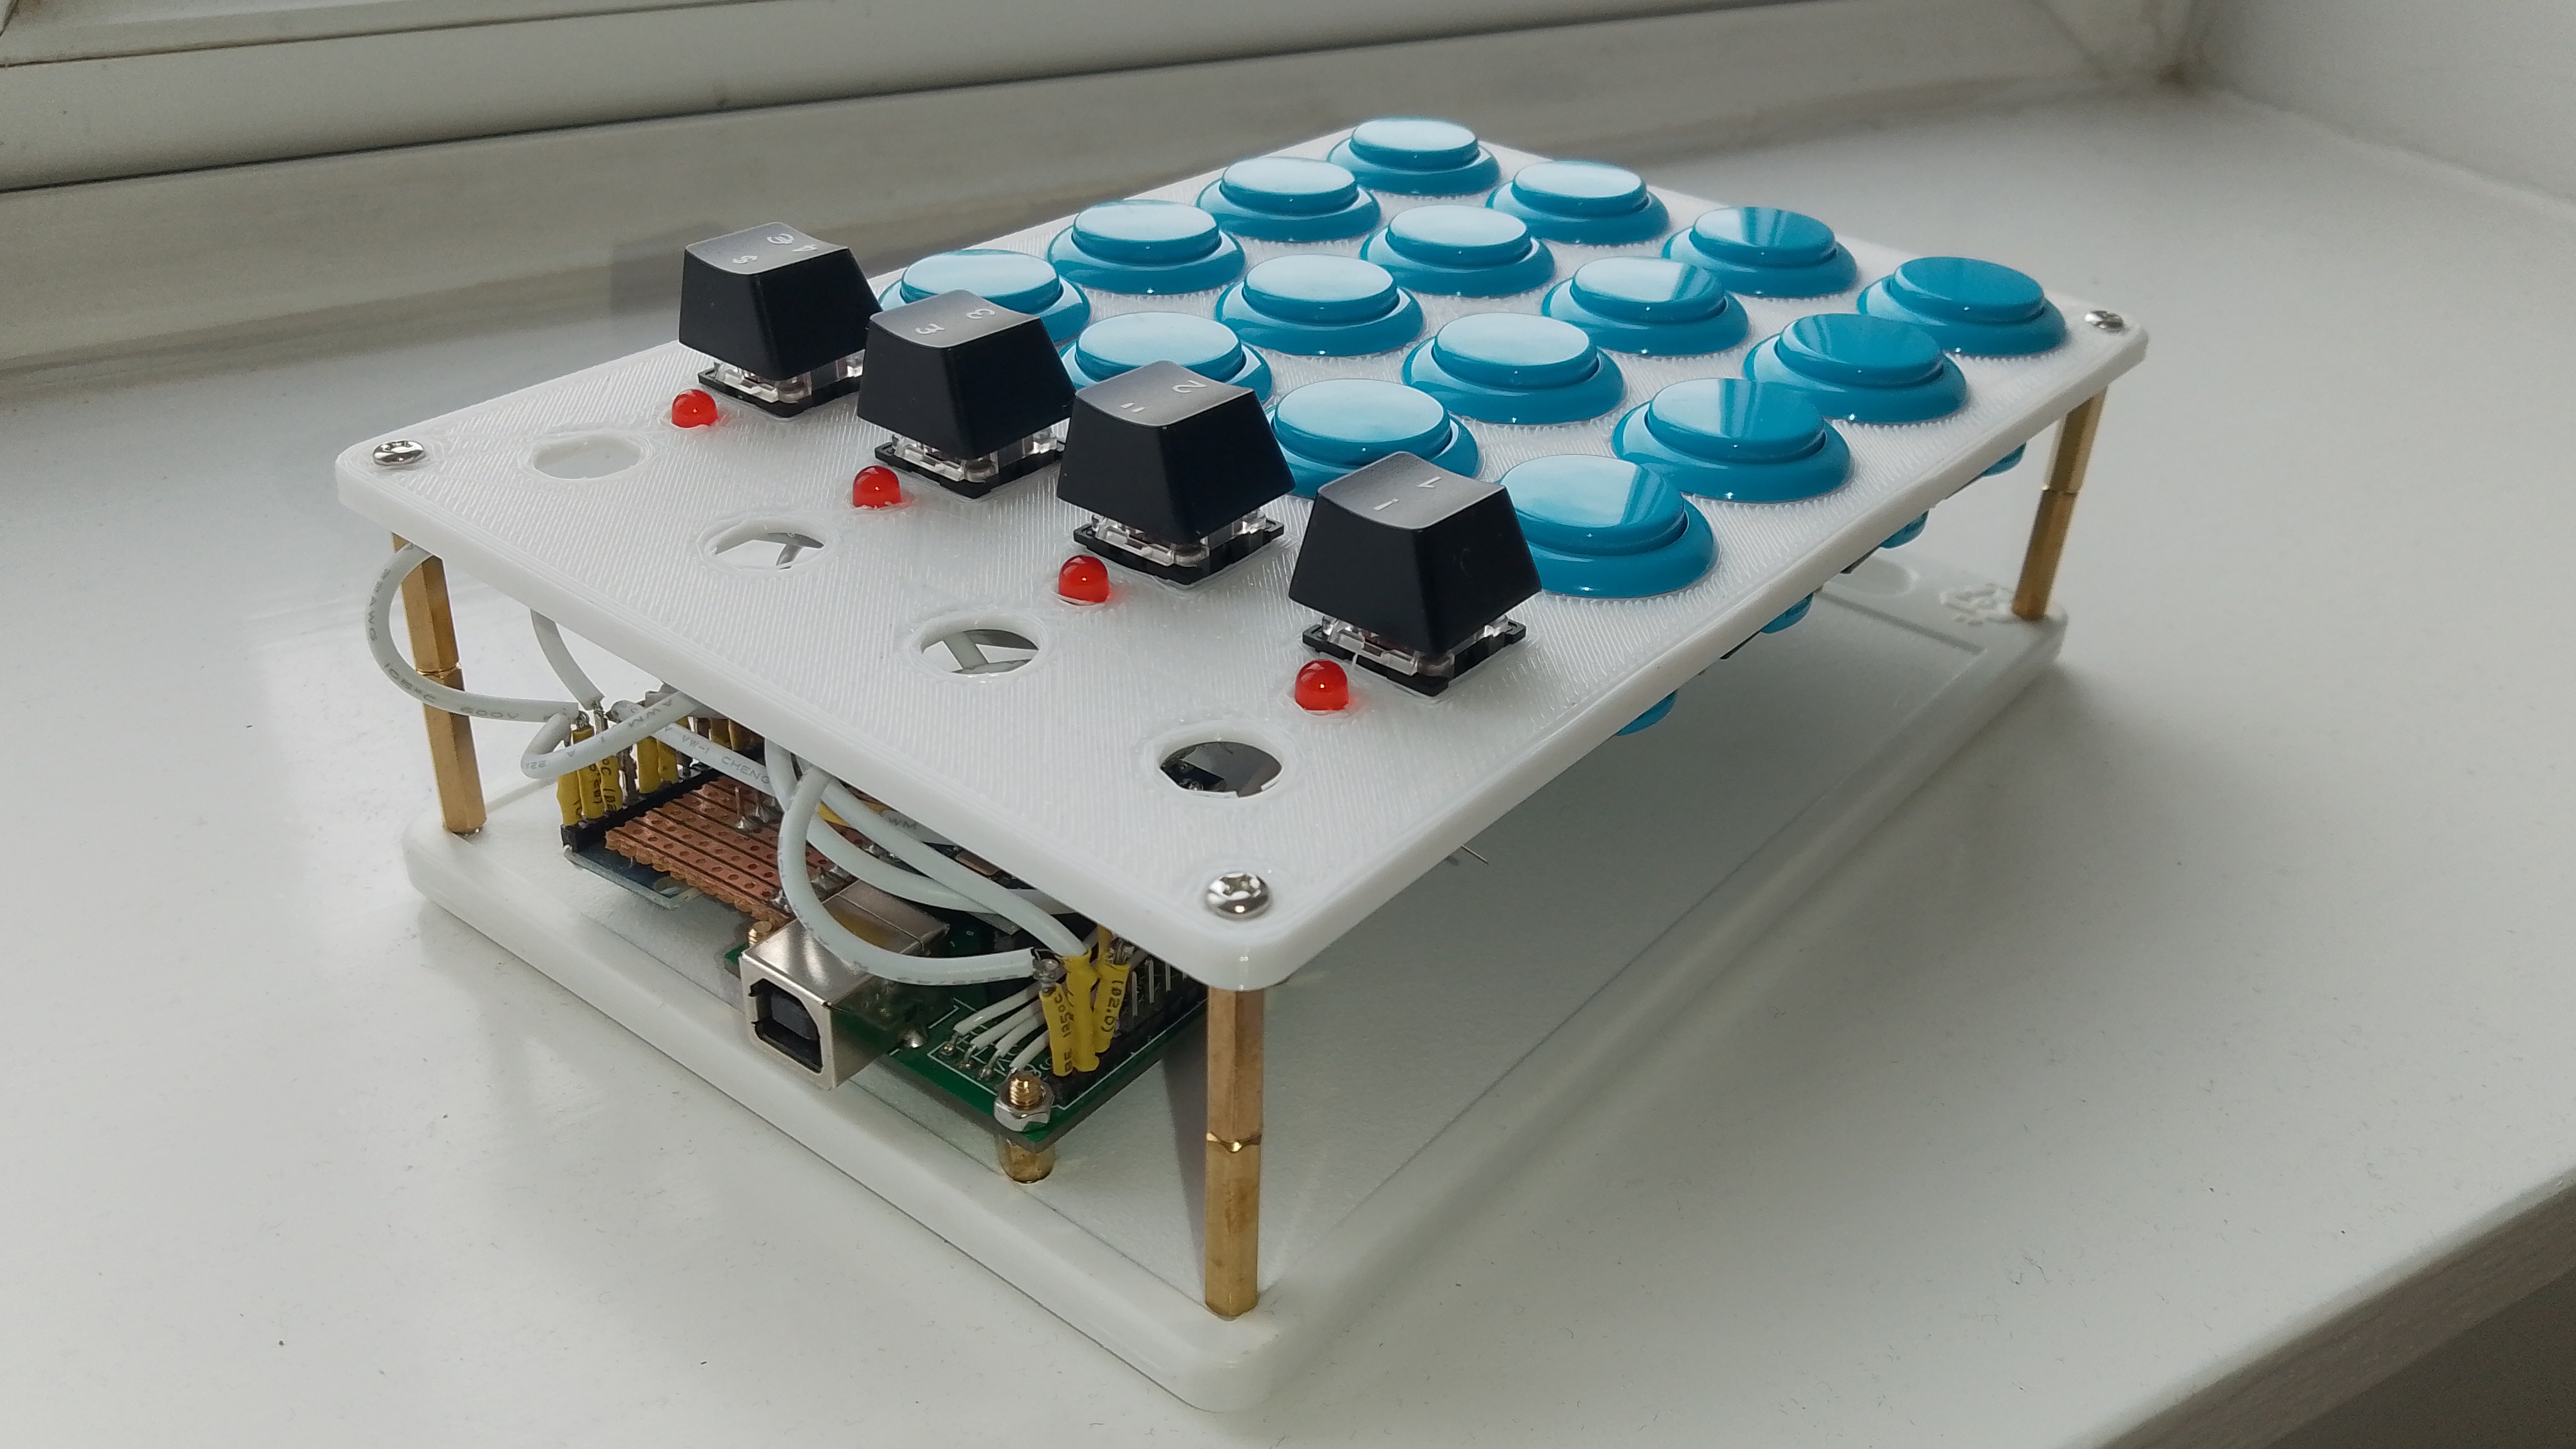
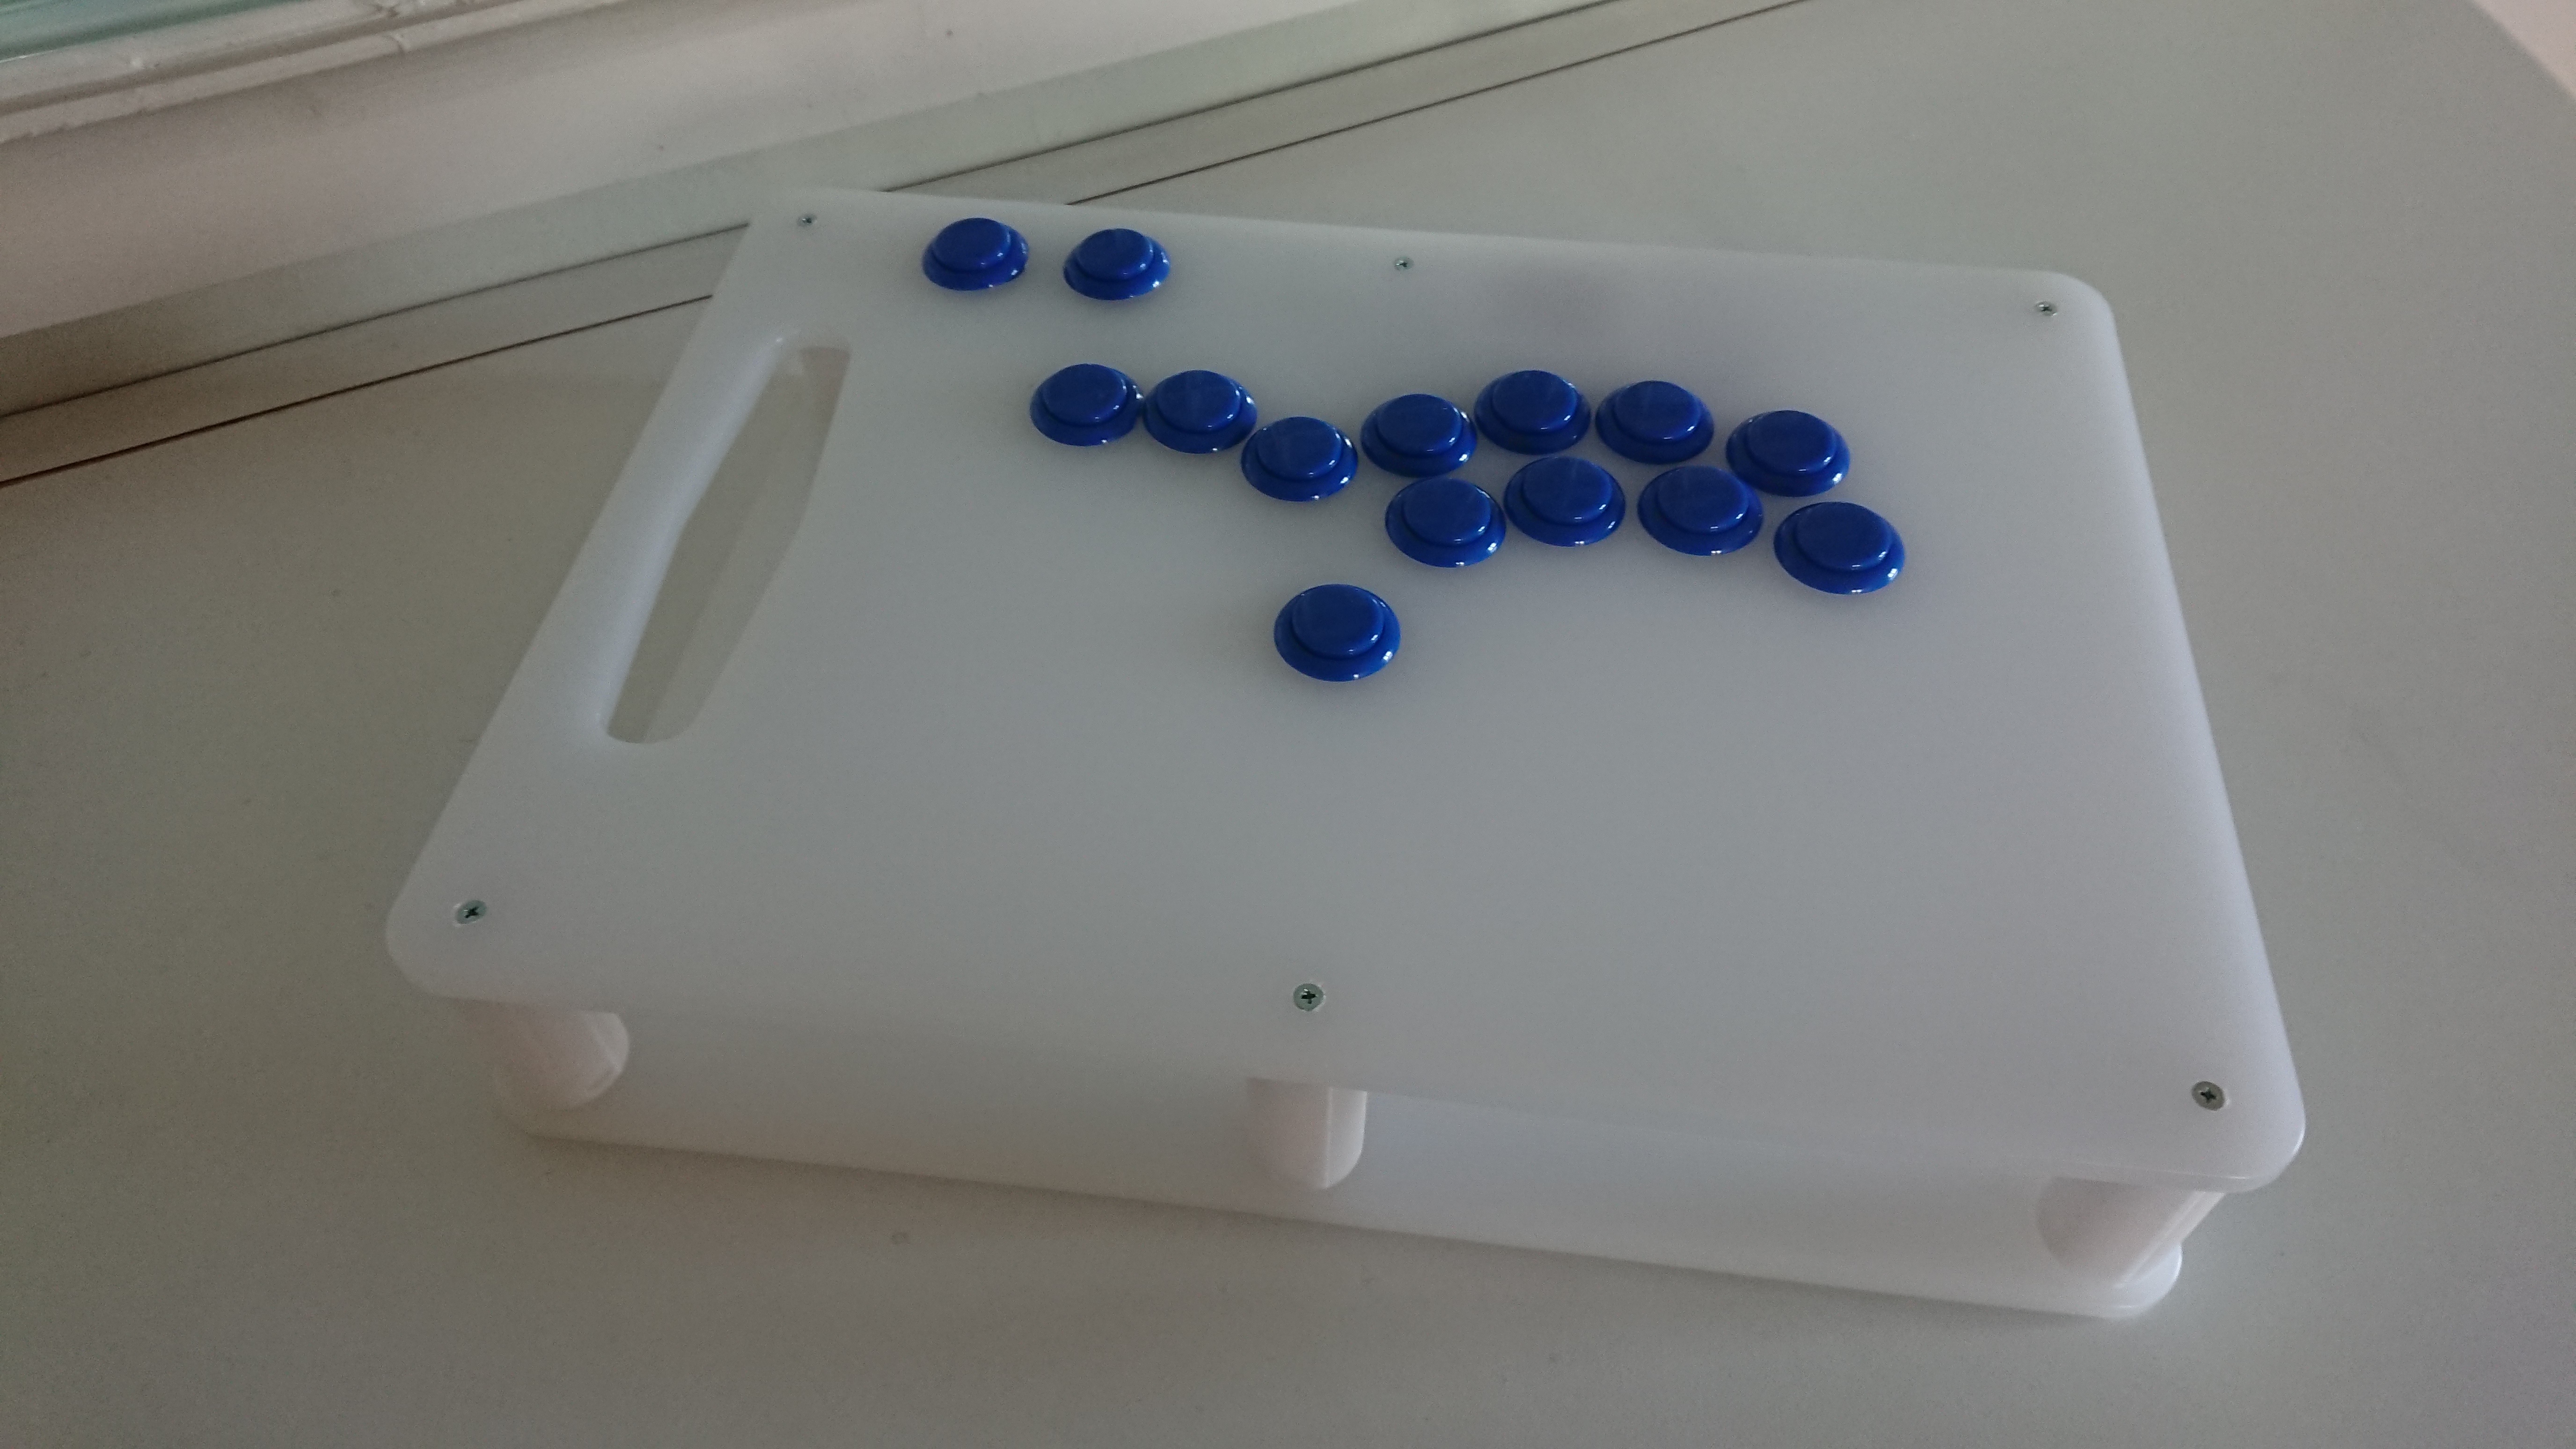
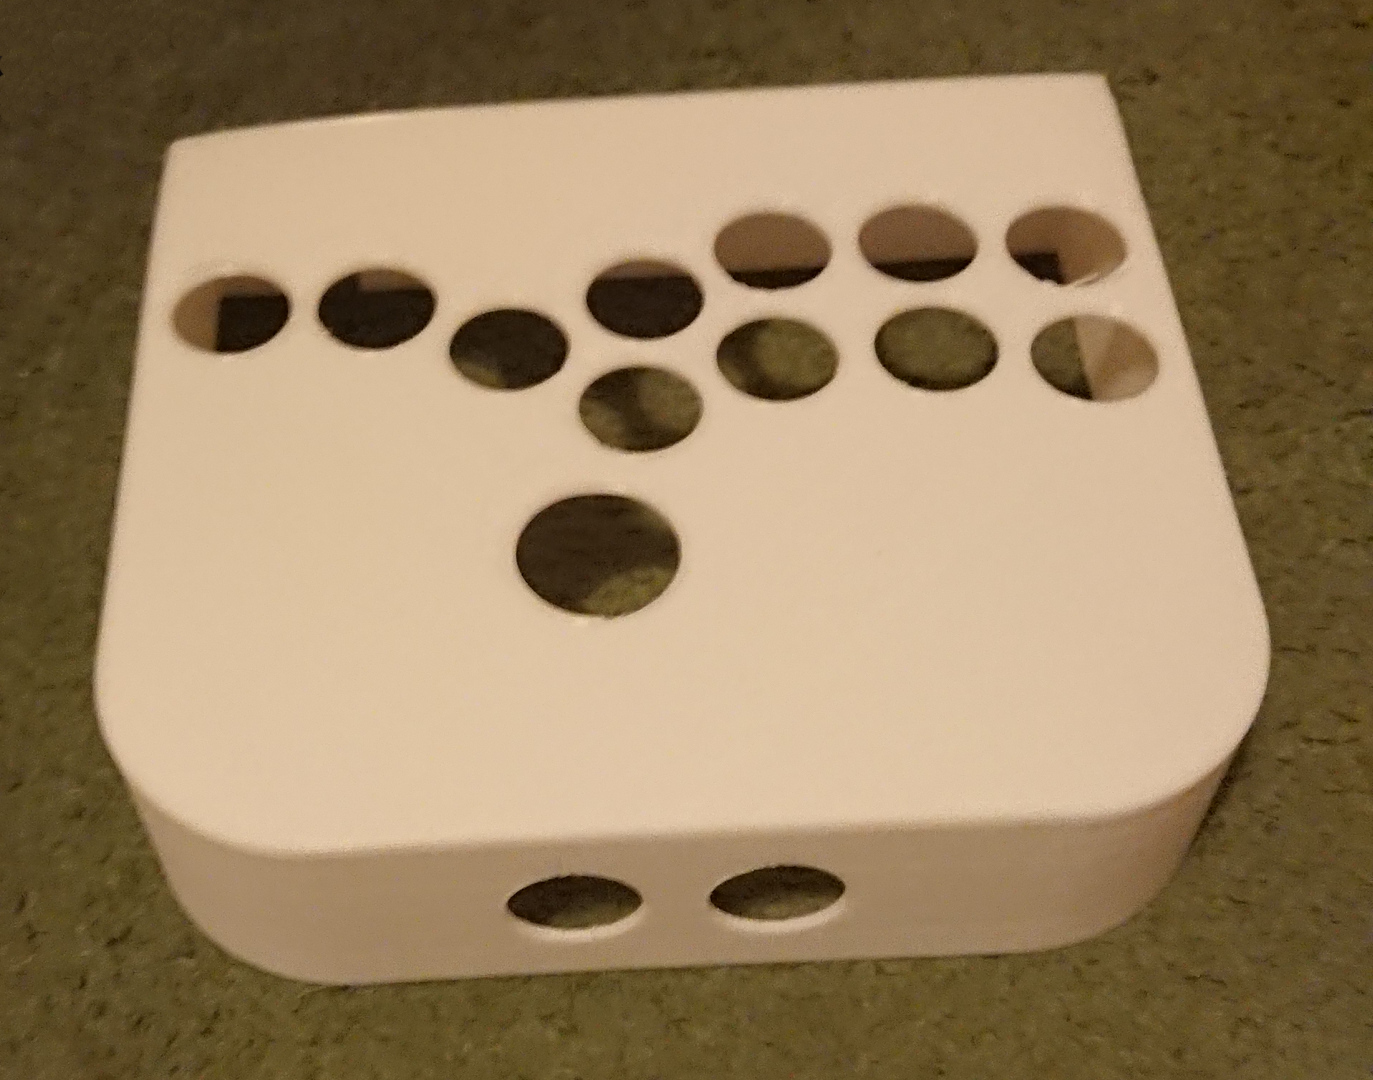
My version of the Hit Box is relatively close to the original, given my self-imposed budget and manufacturing constraints. I changed the layout by shifting the bottom row of buttons slightly to the right after finding the “official” layout slightly uncomfortable. My version only has Select and Menu buttons in addition to the main controls, omitting the Windows button and L3 and R3 buttons featured on some controllers. I also replaced the large 30mm jump button with a 24mm button to save my having to buy two different sized drills for cutting the mounting holes.
The controller went through a number of iterations before reaching its final form. My first attempt was entirely 3D printed and worked reasonably well. I decided that I didn’t like the button layout but unfortunately couldn’t make the modification I wanted to make without the controller becoming too wide to fit on my 3D printer’s bed. It also took a long time to print, and wasn’t really rigid enough to feel solid in use.
Incidentally, I based my V1 prototype on the one in this video, remaking it from scratch in AutoDesk Fusion 360. I also printed myself the stick version from the site and fitted it with suspiciously non-Sanwa labelled “genuine” Sanwa 30mm arcade buttons from ebay. They were slightly cheaper, but don’t feel as nice as the ones I subsequently bought from Arcade World UK, which definitely do look genuine. I used a cheap Zero Delay USB Control Board, which I really don’t recommend - they get recognised as Generic USB joystick and not all of the games I tried played nicely with it. I much prefer my DIY controller, which emulates an Xbox 360 controller.
For my second attempt, I designed a case for the Hit Box that I could print in parts.
This version was a lot more comfortable than the first with the extra space for putting my hands but sadly felt so flimsy and springy to use that it was immediately frustrating rather than fun to play on. Also, warping of the top panel meant I couldn’t close the case properly. I think I could have fixed this by adding more support to the design but this was starting to increase the complexity and printing time, and I didn’t want to go through all of that without being certain that it would work.
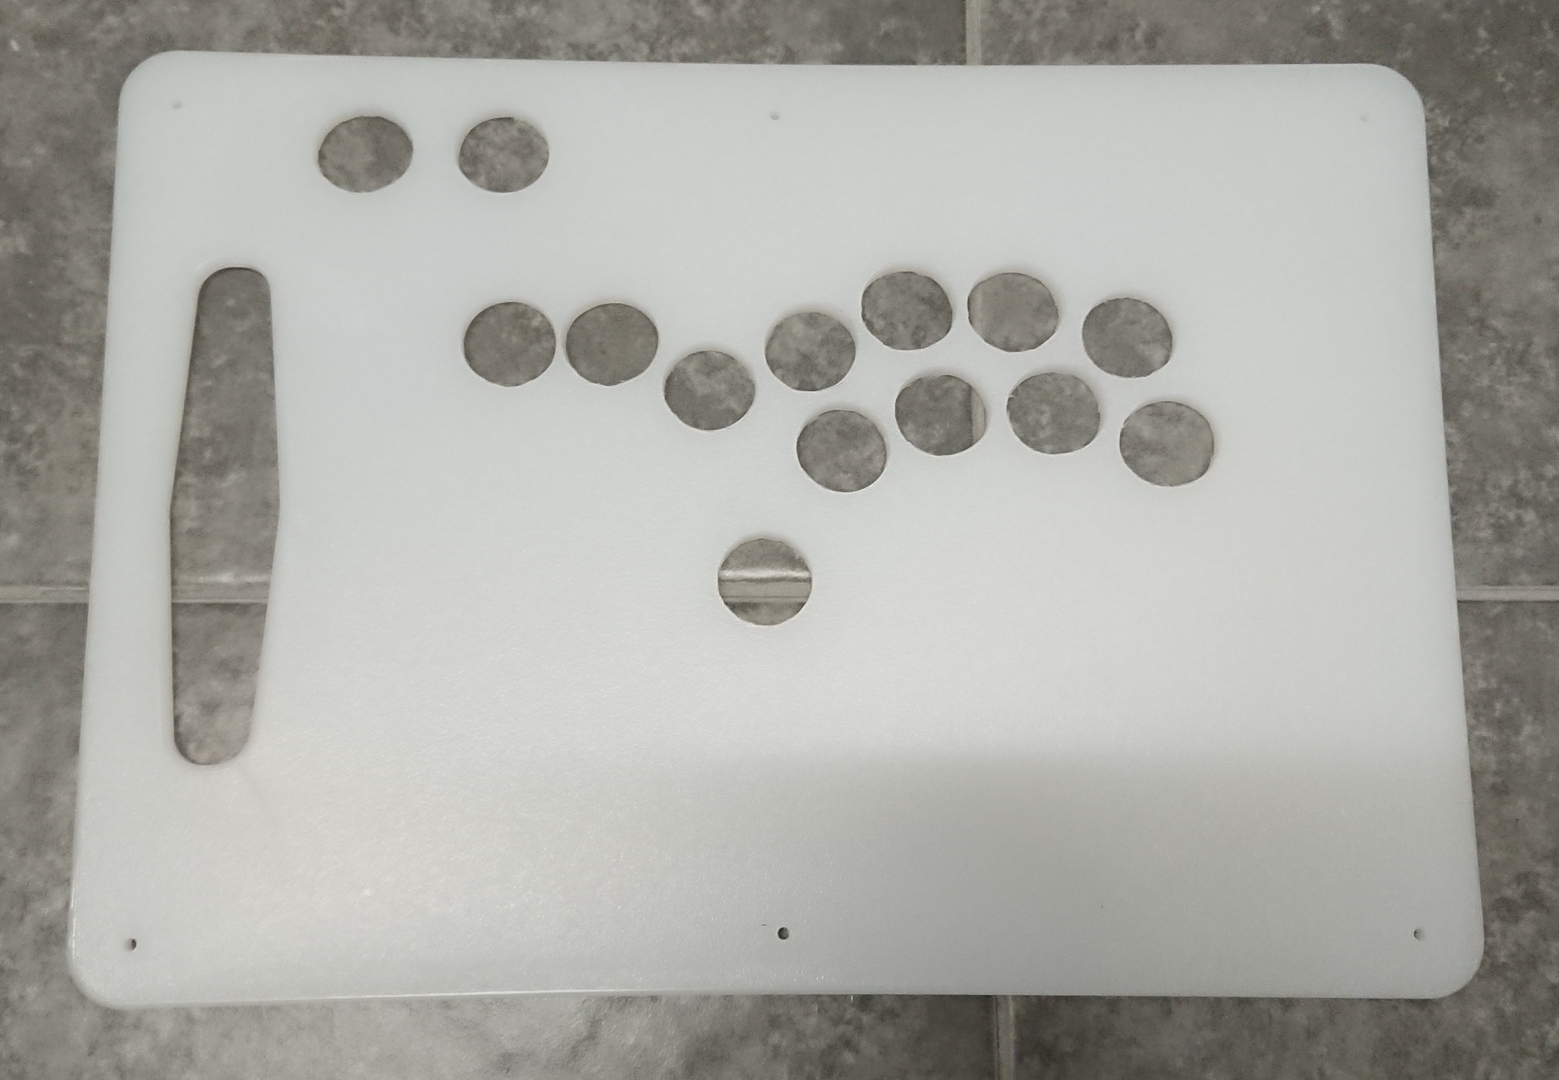
I decided that to get the rigidity and size I needed for the top panel I’d have to use a different material. While shopping in Tesco I found the answer - cheap LDPE (Low-density polyethylene) chopping boards. They’re cheap (£2 each), reasonably rigid, don’t need sawing to size and are soft enough to drill easily.
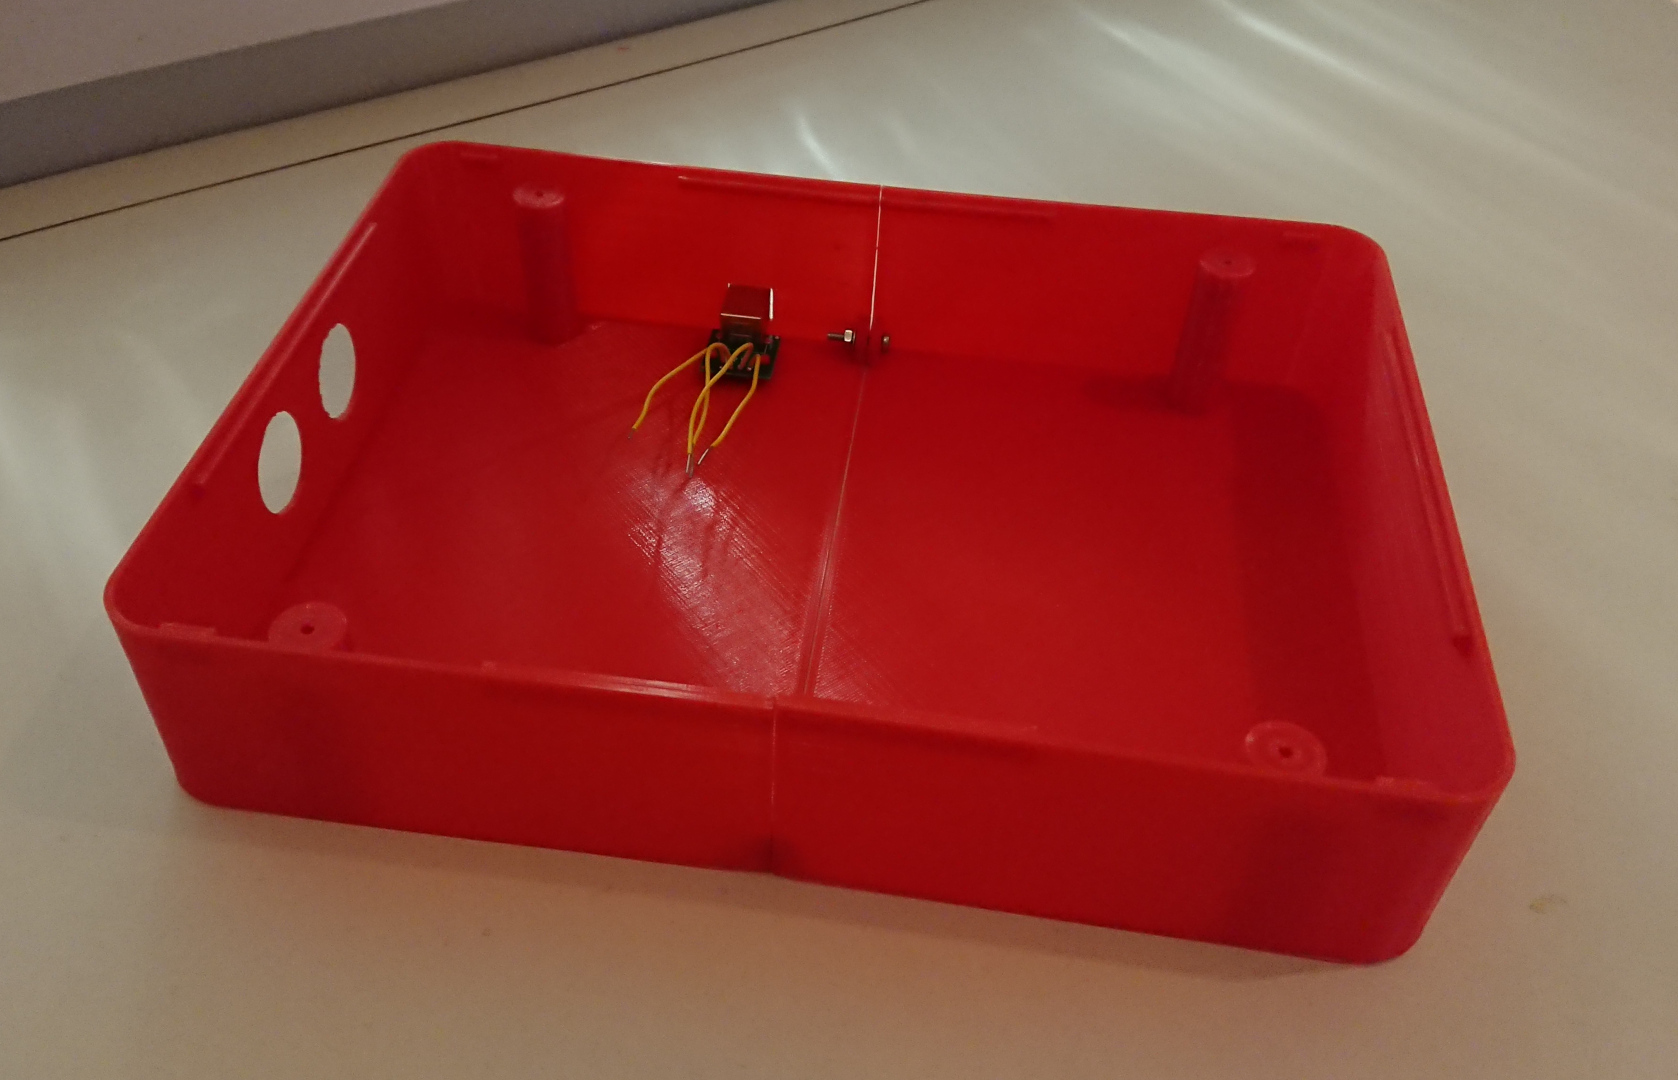
The main downside to using LDPE is that it doesn’t glue very well. You can buy special glues that will work with it, but I decided that I could get away without any gluing. The first step was working out how to join the two boards together to make top and bottom panels. You could just use long bolts to do this, although they would end up sticking out of the bottom of the case, which would be a bit messy and likely to scratch your desktop. Instead I designed 3D printed mounting posts. I made five posts to support the board, and an extra post with a mount for my circuit board and USB socket breakout board.
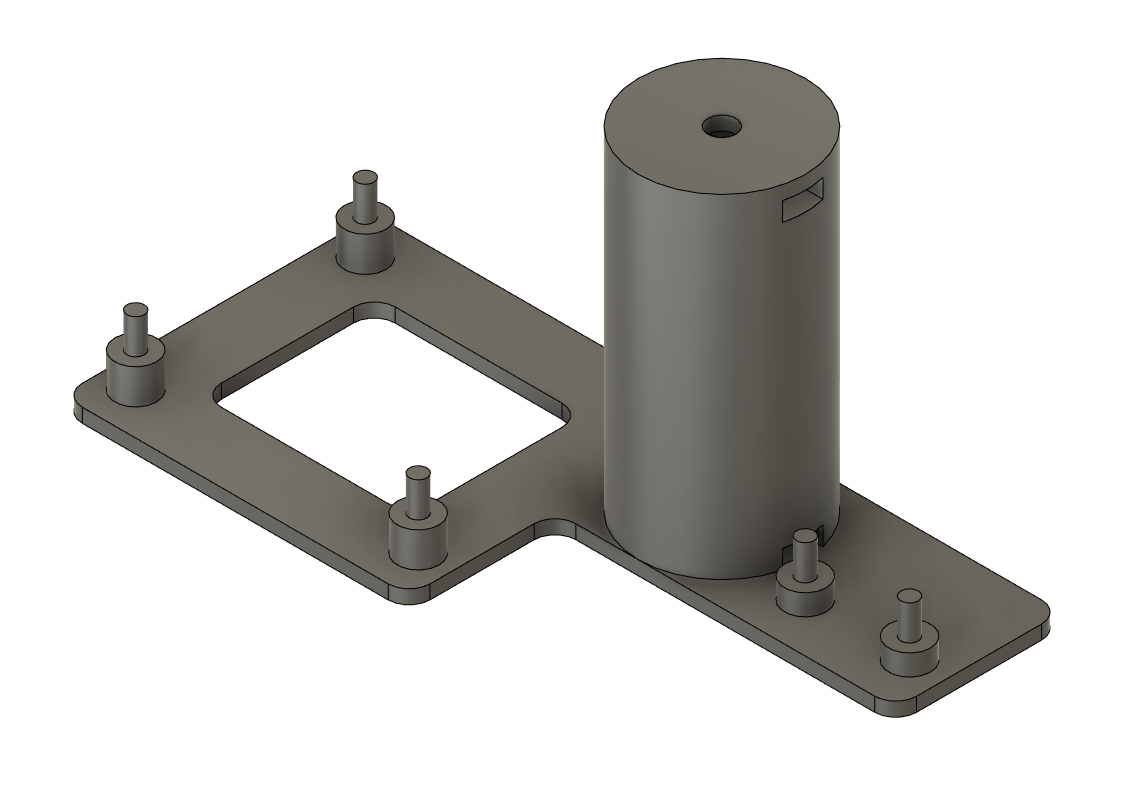
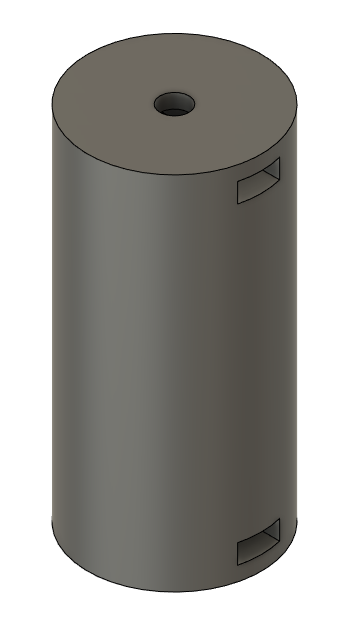
The posts secure using a captive nut inside a slot in the post. I tried this technique on my MixBox design and found it effective and reasonably quick to design in. It was a lot less hassle than using melt-fit screw inserts, and more reliable than screwing directly into the plastic. The posts may be wider than they need to be (they’re 24mm to match the buttons) but this helps prevent the top and bottom panels shearing sideways.
It is worth countersinking the screw holes on the panels so that the screws don’t scratch your desk, legs, hands, etc.
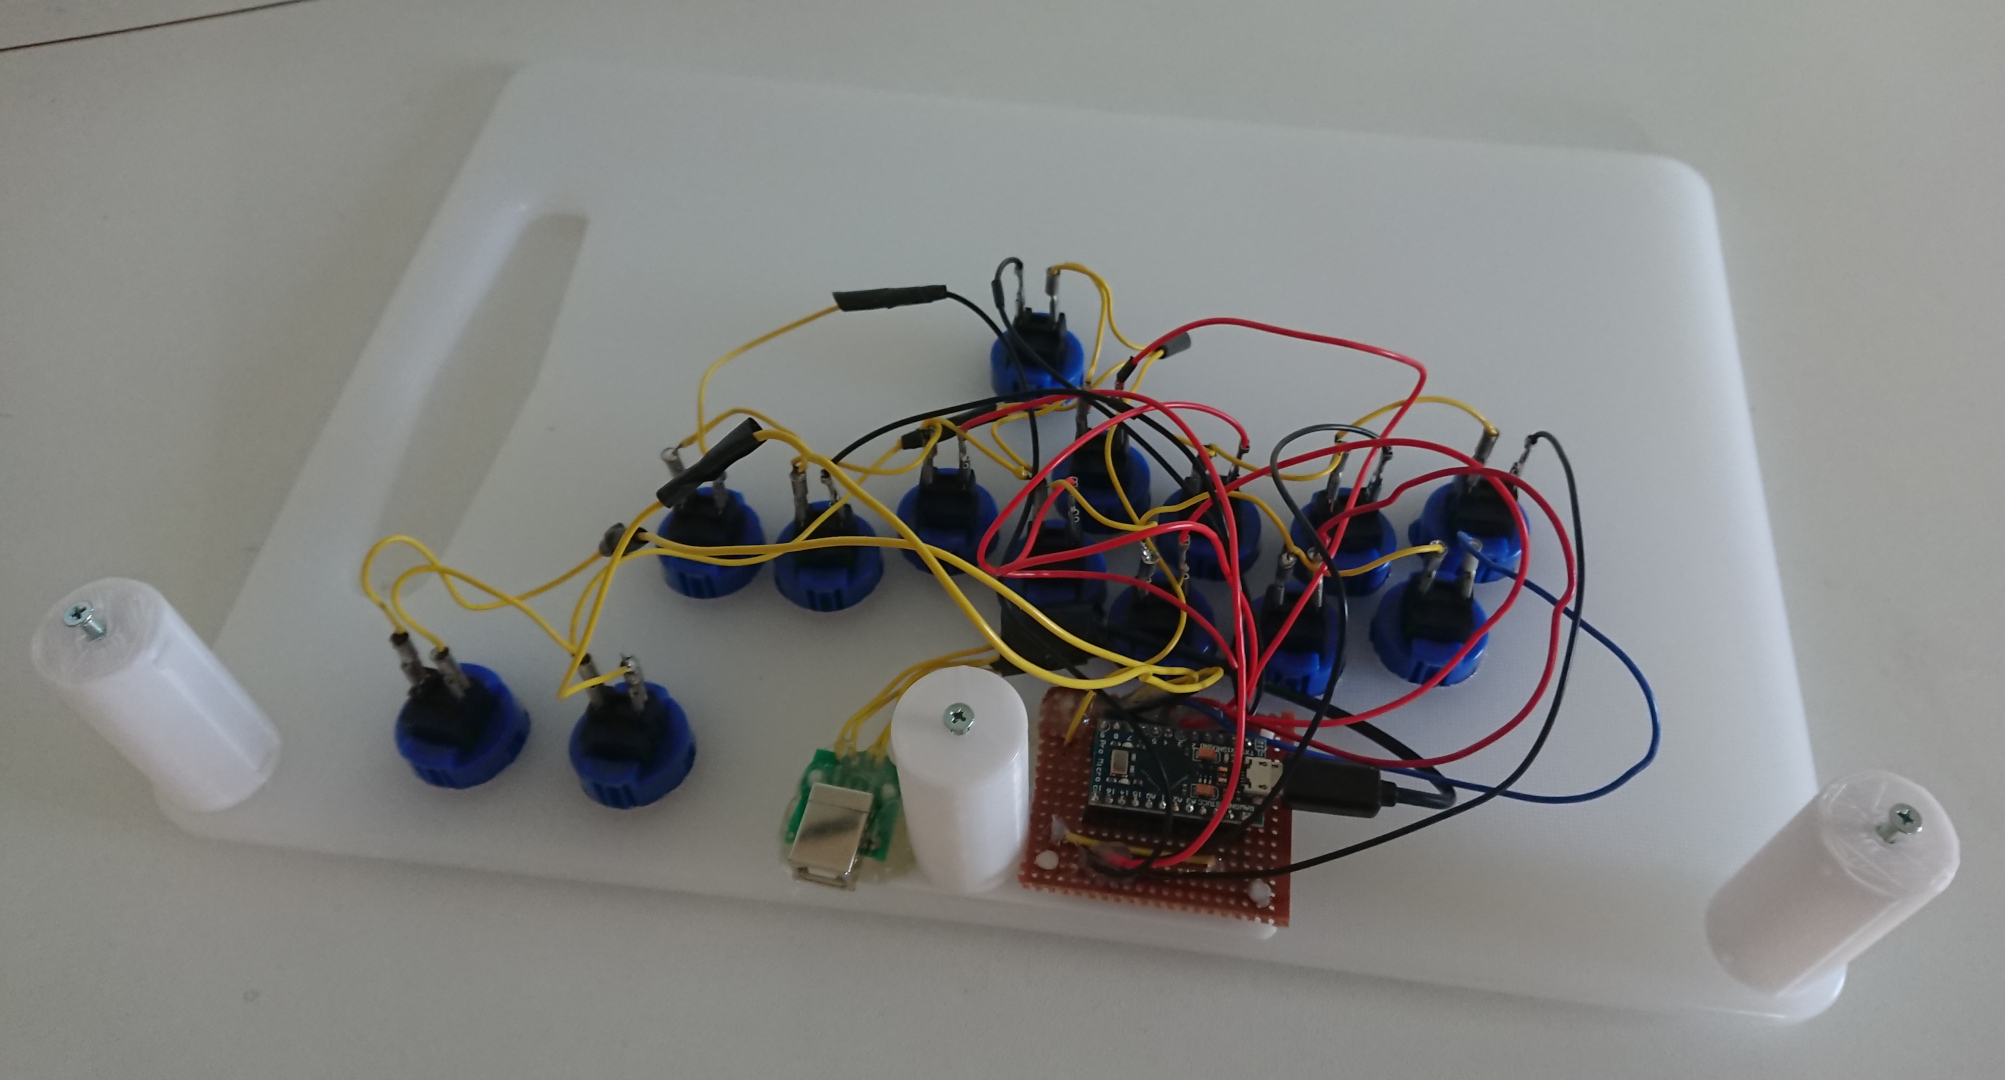
The internal wiring’s not the tidiest thing I’ve ever done. I’ll probably need to go back at some point and put some insulation on all of the exposed bits of metal to stop short circuits causing unwanted button presses. I may also solder the wires to the buttons for a better connection.
The electronics are the same as in my Mix Box, with the Arduino being placed in a socket on piece of Veroboard which acts as a breakout board for the button wiring. An important part of the design is that all components attach to a single piece of the case. This makes it easier to assemble the controller and means I can open it for maintenance alter without the wires being disturbed.
Conclusion
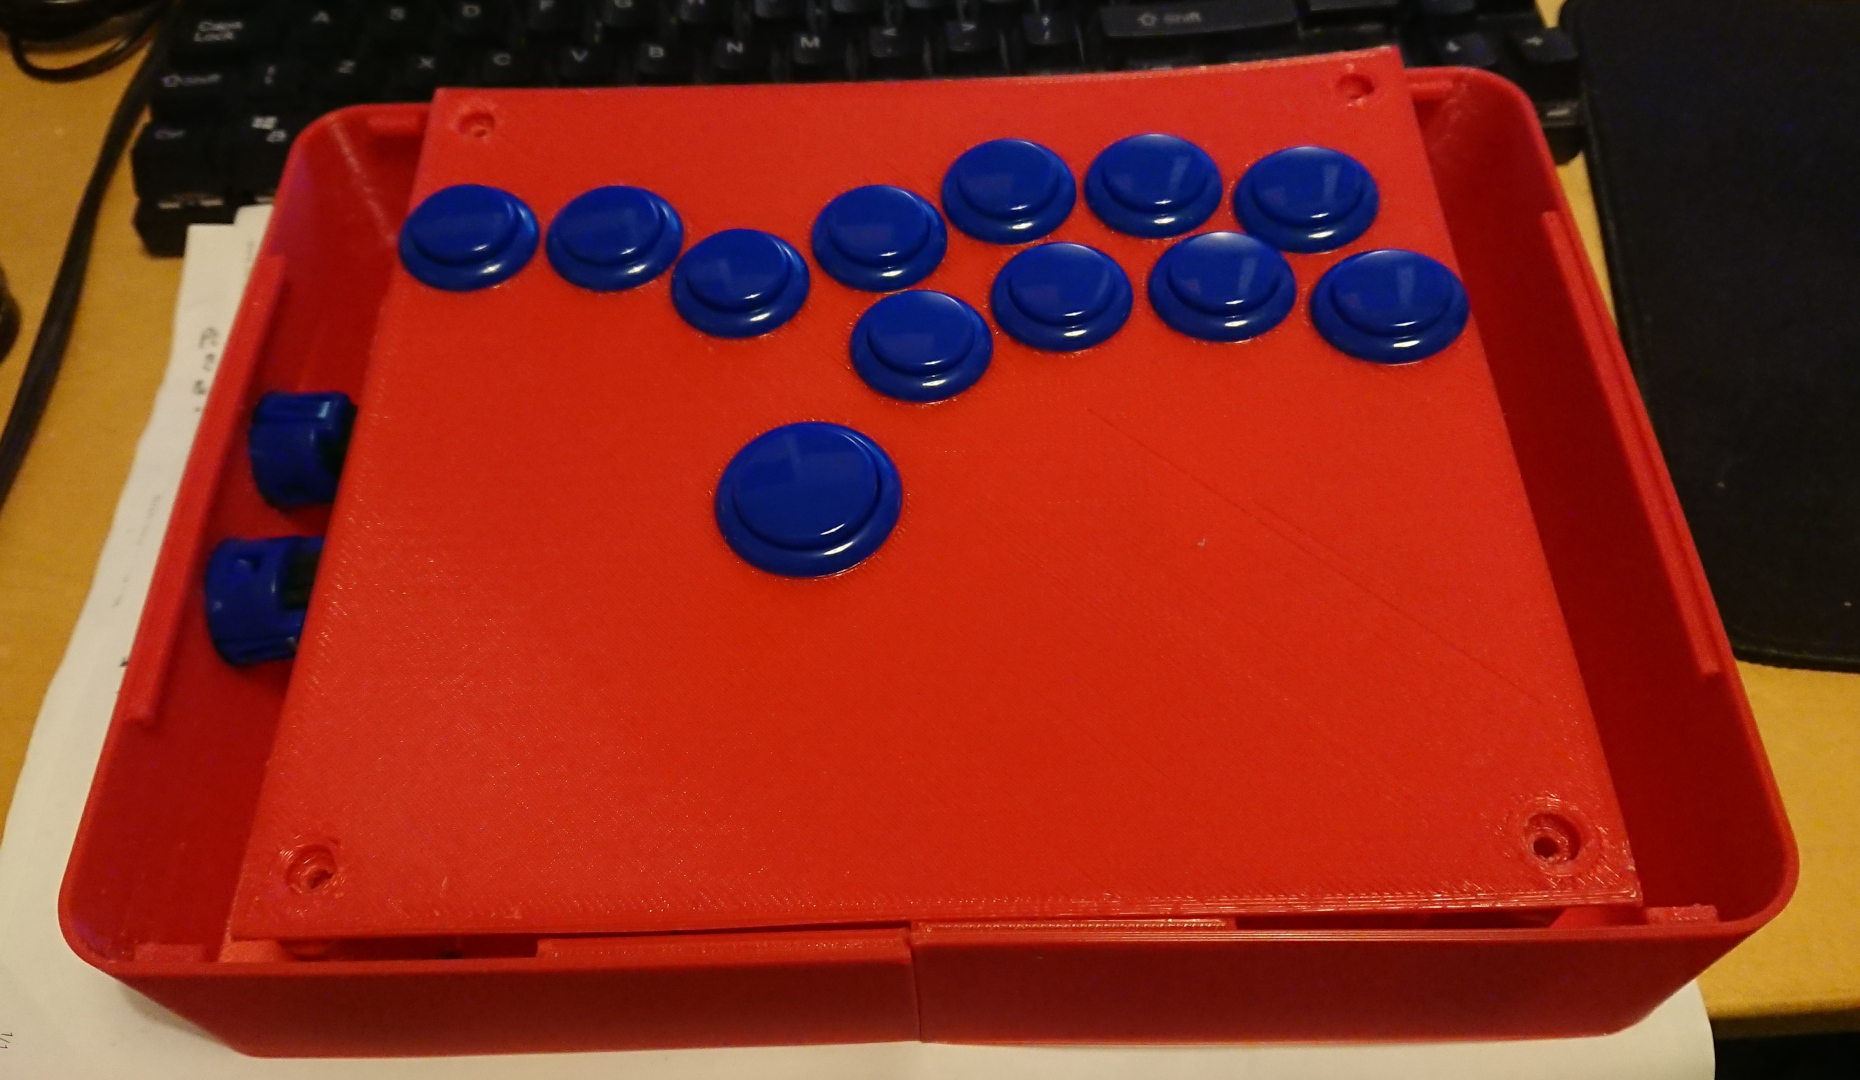
I’m delighted with how well this project has turned out. Having the buttons attached to a solid surface makes them feel responsive and fast. They can now travel only as far as they need to register, rather than having to also absorb flex in the top panel.
The only real drawback I’ve found is that having a thicker top panel means that the Sanwa buttons don’t snap into place. Fortunately mine are a good fit in the holes. If they weren’t, then I think I’d have to consider making collars for the buttons, which I could glue to the undersides of the buttons to hold them to the top of the case. Either that, or investigate the LDPE gluing options that I had been trying to avoid.
The controller feels heavy and solid and it even has a convenient carrying handle on the side! There is plenty of space to rest my hands and the larger case design means I was able to fit my preferred USB type-A socket.
Best of all, the stick comes in at a ridiculously low price of around £40, of which £25 was for the buttons, which are by far the most expensive part. If you already own the right size drill bit and have a selection of nuts and bolts you can use, then you can save even more. You don’t have to use expensive Sanwa buttons for the Menu and Select buttons, and in fact, if you just want to see if a Hit Box is something you’d like to try out, you could start with cheap ebay buttons and upgrade them later.